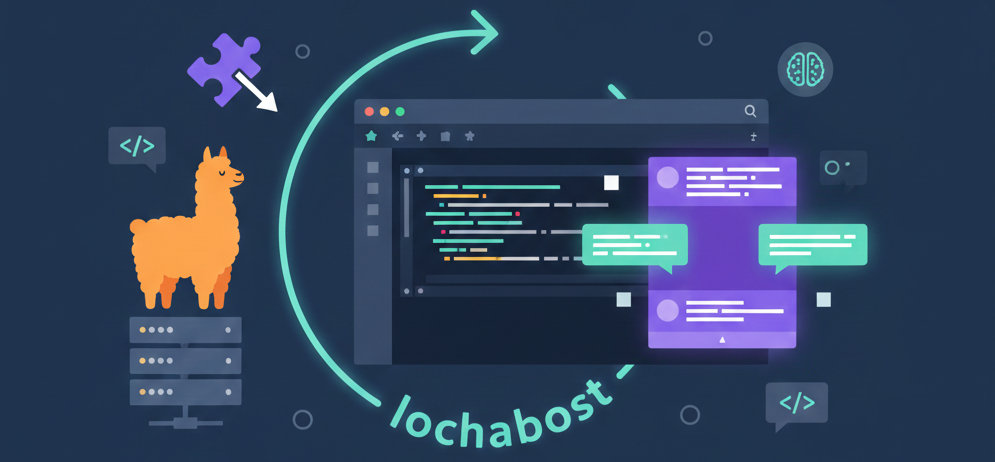
Install and Configure Continue in VSCode with Ollama
Vscode using the Continue extension and configuring Ollama
Here’s a step-by-step guide to installing and configuring the Continue extension in Visual Studio Code (VSCode) with Ollama.
Step 1: Prerequisites
Before you begin, make sure you have:
- Visual Studio Code installed. You can download it here: VSCode.
- Ollama installed. Visit Ollama to install this AI model manager.
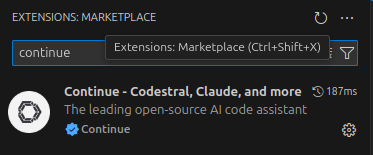
Step 2: Install Continue in VSCode
👀 Installing Continue in VS Code
-
Open VSCode.
-
In the left panel, click on the Extensions icon.
-
Search for Continue in the extensions search bar.
-
Click Install for the Continue extension.
Step 3: Configure Ollama
Ollama is needed to manage AI models like LLaMA 3 and StarCoder. Ensure that Ollama is properly installed and configured.
-
Install Ollama by following the instructions provided on their site: Ollama Installation.
-
Once installed, verify that Ollama is working correctly by opening a terminal and running the command:
ollama list
Step 4: Modify the config.json File
To configure the models used by Continue (chat, autocompletion, embeddings), you need to modify the config.json configuration file.
- Open Visual Studio Code.
- Press
Ctrl + Shift + Pto open the Command Palette. - Type Continue: Open config.json and select this option.
This will open the config.json file where you can define the models you want to use.
Here’s an example configuration for using LLaMA 3 for chat, StarCoder 2 for autocompletion, and nomic-embed-text for embeddings:
{
  "models": {
    "chat": {
      "model": "llama3-70b",
      "provider": "ollama",
      "parameters": {
        "temperature": 0.7
      }
    },
    "autocomplete": {
      "model": "starcoder-2-7b",
      "provider": "ollama",
      "parameters": {
        "temperature": 0.2
      }
    },
    "embeddings": {
      "model": "nomic-embed-text",
      "provider": "openai",
      "parameters": {}
    }
  }
}
If you prefer to use DeepSeek Coder v2 for autocompletion, modify the autocomplete section as follows:
"autocomplete": {
  "model": "deepseek-coder-v2:16b",
  "provider": "ollama",
  "parameters": {
    "temperature": 0.2
  }
}
Step 5: Download and Install Models via Ollama
Next, you need to download the necessary models via Ollama.
- Download the LLaMA 3 70B model:
ollama pull llama3-70bDownload the StarCoder 2 or DeepSeek Coder v2 model, depending on your choice for autocompletion:
-
For StarCoder 2:
ollama pull starcoder-2-7b -
For DeepSeek Coder v2:
ollama pull deepseek-coder-v2:16b -
For embeddings, make sure you have the nomic-embed-text model downloaded
<u>(this should be automatically configured by Continue)</u>.ollama pull nomic-embed-text
Step 6: Start Continue in VSCode
Once you have installed and configured all the models, you are ready to use Continue in VSCode.
- Open a project in VSCode.
- Use the Continue: Start command in the command palette (Ctrl + Shift + P).
- You can now use Continue with the models you have configured for interactive chats, autocompletion, and embeddings.
Step 7: Test the Models
Start by testing if the models are working correctly.
- For chat, try starting a session and check that LLaMA 3 is being used.
- For autocompletion, type some code and see if StarCoder 2 or DeepSeek Coder v2 offers relevant completions.
- For embeddings, use features that require embedding vectors and check that nomic-embed-text is being used correctly.
👀 In action:
{{< rawhtml >}}
{{< /rawhtml >}}{{< rawhtml >}}
{{< /rawhtml >}}